Most projects using microcontrollers start out very basic, reading sensors, turning on and off LEDs, or transmitting data via serial. With increasing project sizes, however, such so-called overhead activities as wireless communications, real-time sensing, user interfaces, and data processing begin to compete with CPU time. Here the dual-core architecture of ESP32 comes as a huge benefit.
The ESP32 has two independent processing cores (compared to the common single-core microcontrollers), allowing two tasks to be executed simultaneously. This should enable developers to develop more responsive, stable, and scalable systems without changing to entirely new toolchain, when correctly used in the Arduino setup.
This paper discusses the ESP32 dual core under the Arduino IDE and gives specific attention to practical insights, real-world implementation plans and pitfalls without transforming the topic into an RTOS low-level codes manual.
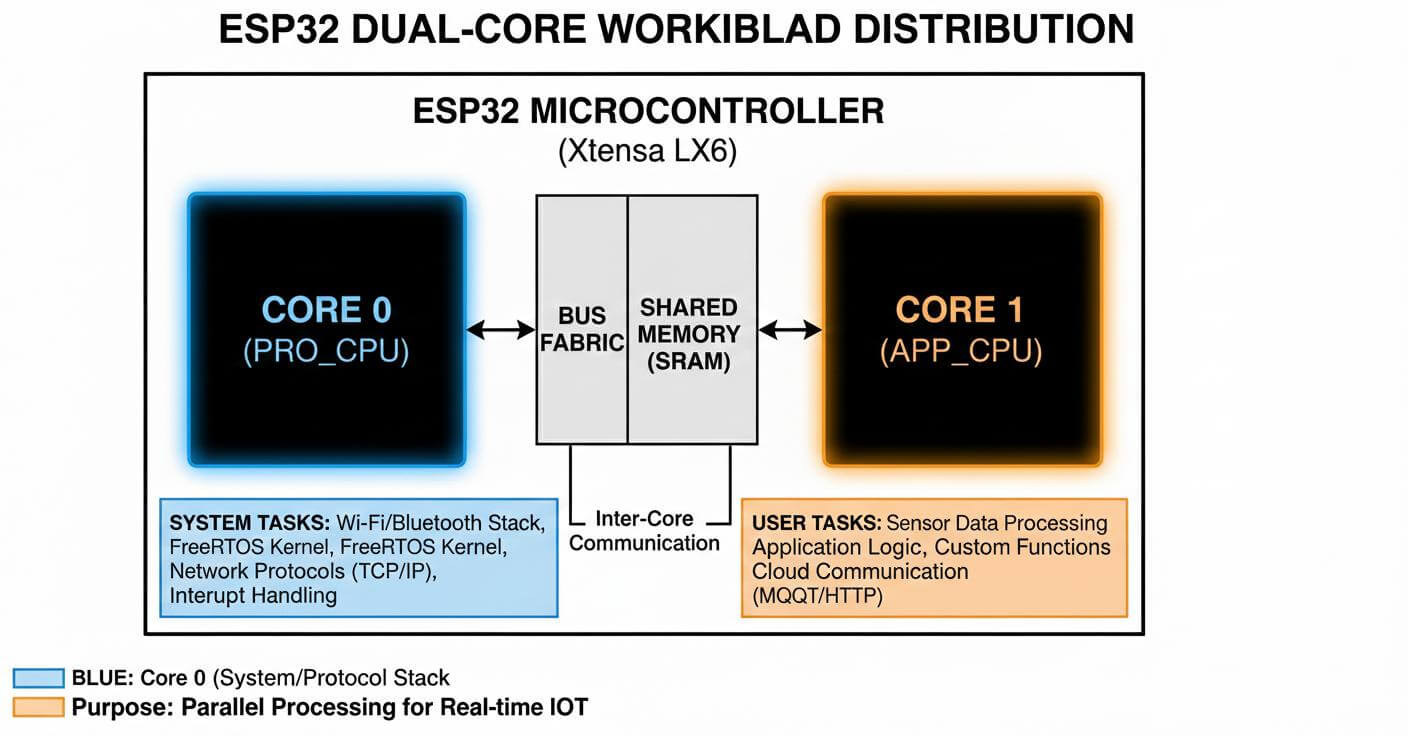
The ESP32 has two independent but shareable memory and peripherals Tensilica processor cores. The system has an internal management of multitasking, scheduling and inter-core coordination using FreeRTOS.
In most ESP32 configurations:
- Core 0 primarily handles system-level operations such as Wi-Fi, Bluetooth, and background services.
- Core 1 is typically used for user application logic.
With the Arduino framework applied to ESP32, a large part of this complexity is removed. Standard set up and loop functions are already used as part of FreeRTOS tasks. Nevertheless, developers may add more tasks and stick them to a particular core when it is necessary to have a fine-tuning control.
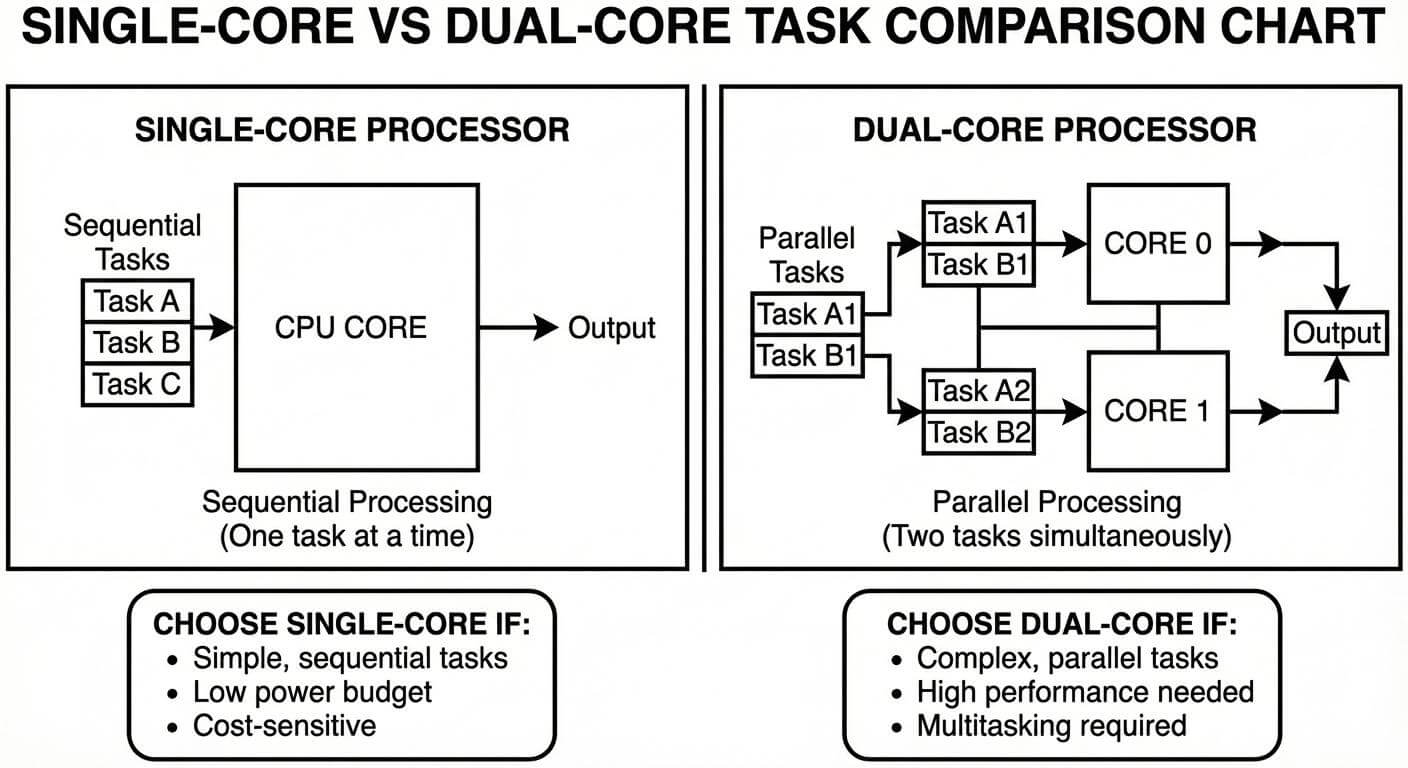
Dual core processing is powerful, but it is not always necessary. Understanding when to use it helps avoid unnecessary complexity.
Good use cases include:
- Running sensor acquisition independently from Wi-Fi communication
- Handling real-time control while updating a display
- Separating time-critical tasks from background logging
- Improving responsiveness in IoT applications
Cases where dual core may not be needed:
- Simple sensor reading projects
- Low-frequency data logging
- Applications with minimal timing constraints
Using dual core should be a design decision, not a default choice. Overusing it can introduce synchronization issues that do not exist in single-loop designs.
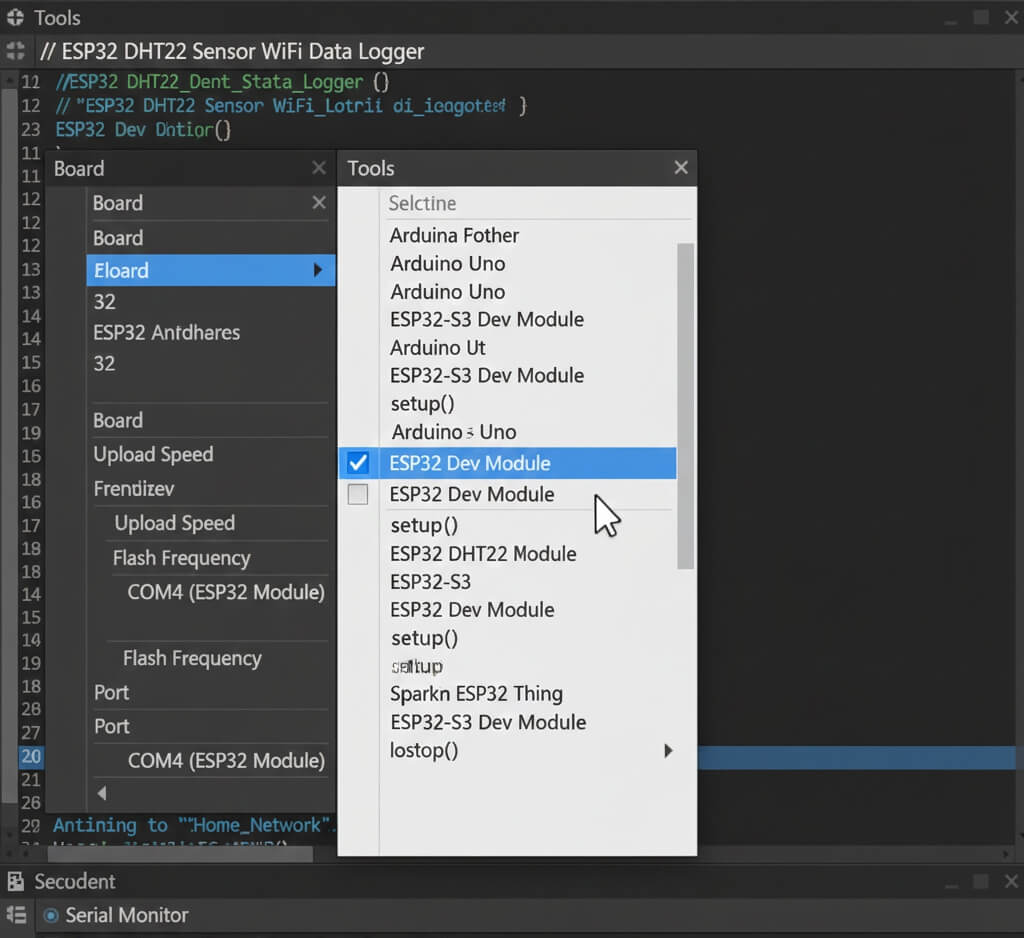
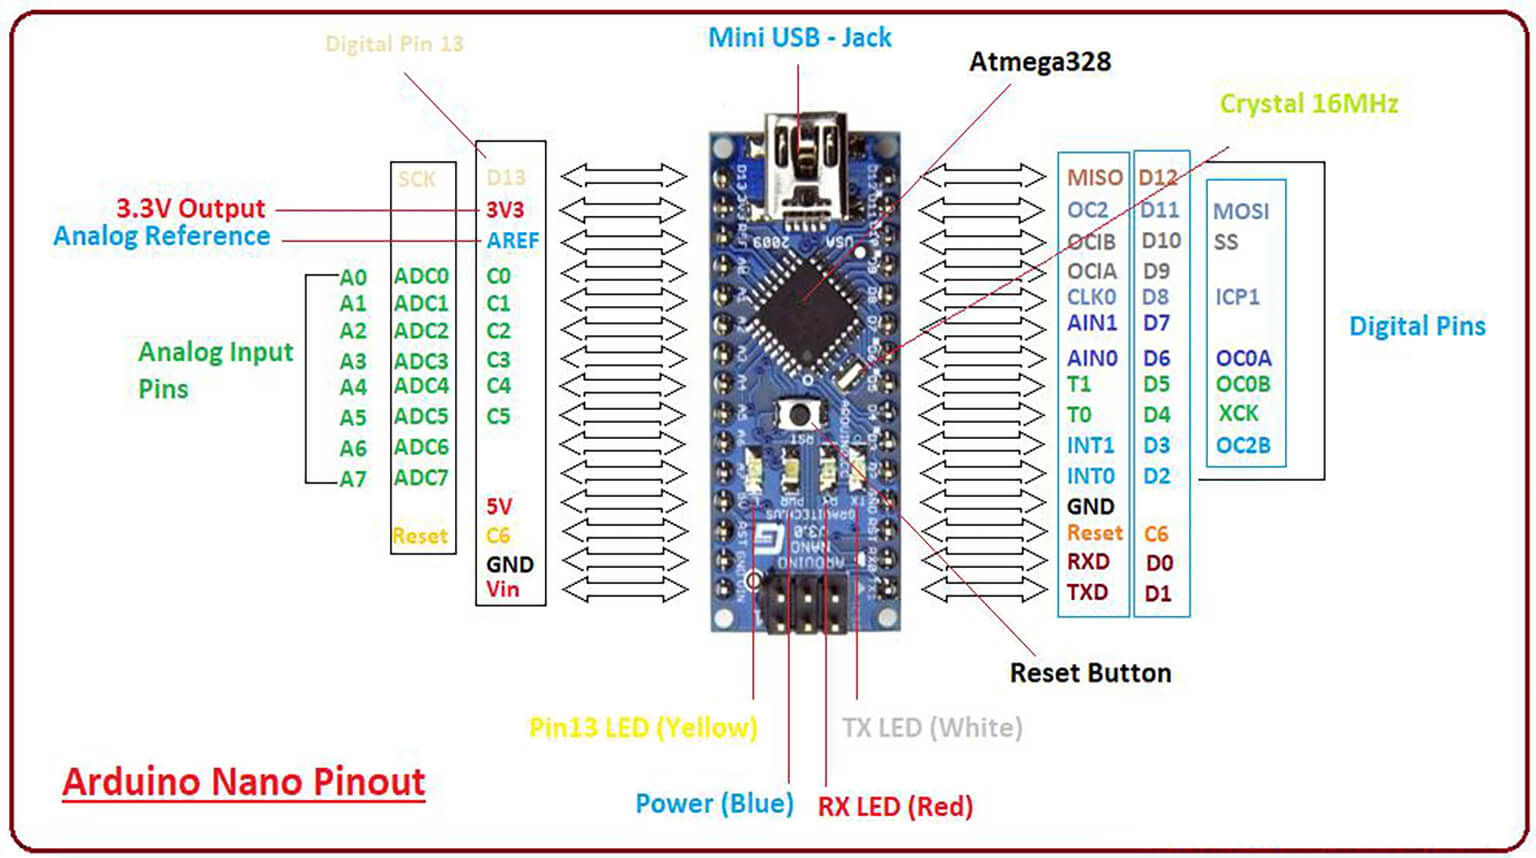
First of all, one needs to install the package ESP32 board in the Arduino environment. The ESP32 is compatible with the Arduino as the user can use it in a manner akin to an Arduino board.
The Arduino IDE is a program that is automatically executed in the ESP32 with the FreeRTOS system. Dual-core support does not need any special configuration to be enabled.
Important setup considerations include:
- Selecting the correct ESP32 board variant
- Using default flash and partition settings unless advanced memory use is required
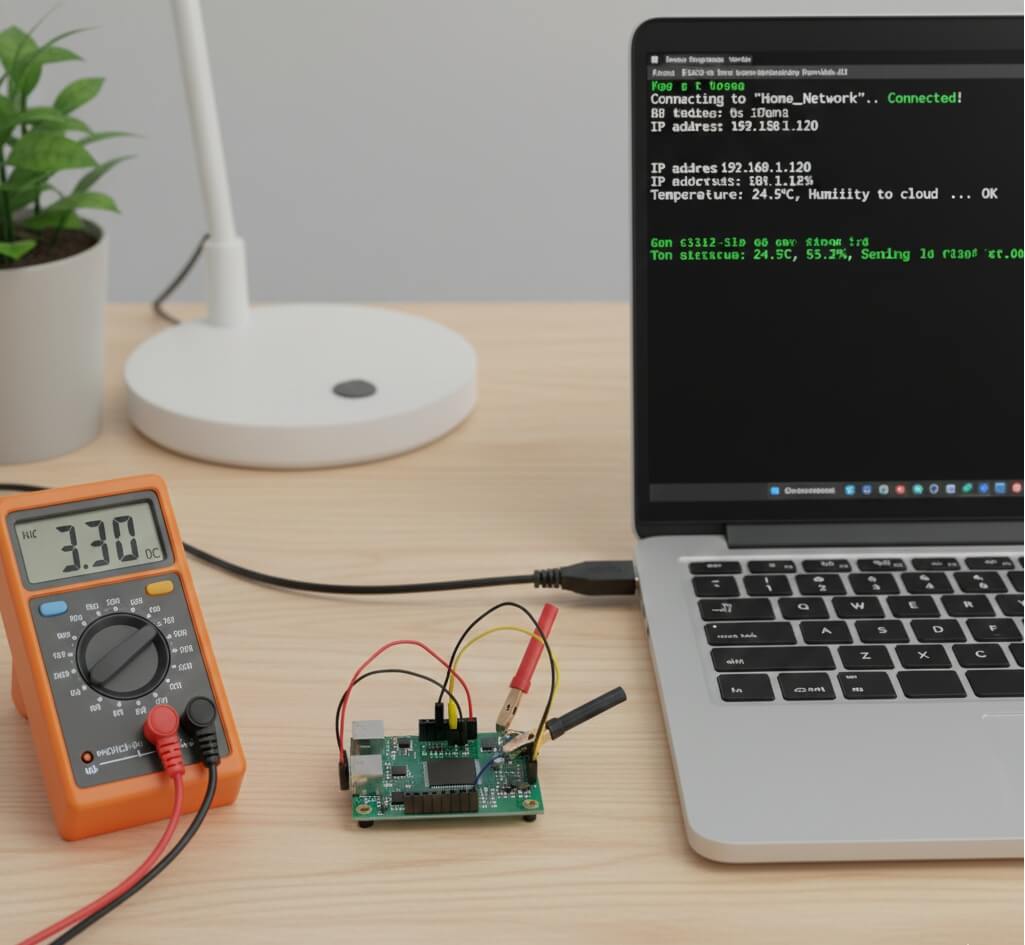
- Enabling serial output for debugging early
At this stage, the system is already capable of multitasking, even if the sketch appears simple.
In the classical Arduino sketch, every logic is executed within loop (). And on the ESP32, loop in itself is a FreeRTOS task that is bound to a core.
In order to utilize dual core capability, developers develop more tasks that:
- Run independently of loop()
- Can be assigned to Core 0 or Core 1
- Operate at different priorities
There is a stack and an execution context of each task, and it is possible to use it in a real parallel way. It is now possible to run sensor reads continuously as communication or UI updates run without blocking.
As an example of a practical practice, one can use a DIY ESP32 project that can read sensors and transmit data via the Wi-Fi network.
The application is divided into logical responsibilities:
- Task A: Reads sensor data at fixed intervals
- Task B: Handles Wi-Fi communication and data transmission
This isolation prevents slow network operation to interrupt time sensitive sensing.
The sensor reading normally is placed on Core 1 whereas communication can be placed on either core 0 or Core 1 depending on system workload. The selection of stack size and priority is done to avoid crashes or starvation.
Such a strategy makes the system responsive even when there is a significant communication traffic.
The capability of utilizing shared resources safely is one of the most crucial things in dual-core programming. Because both cores are allowed to have access to the memory, irresponsible design may result in unpredictable behavior.
Key considerations include:
- Protecting shared variables
- Avoiding simultaneous access to hardware peripherals
- Managing serial output to prevent message corruption
Race conditions can be removed and consistency of data can be guaranteed without undue overhead using simple synchronization methods.
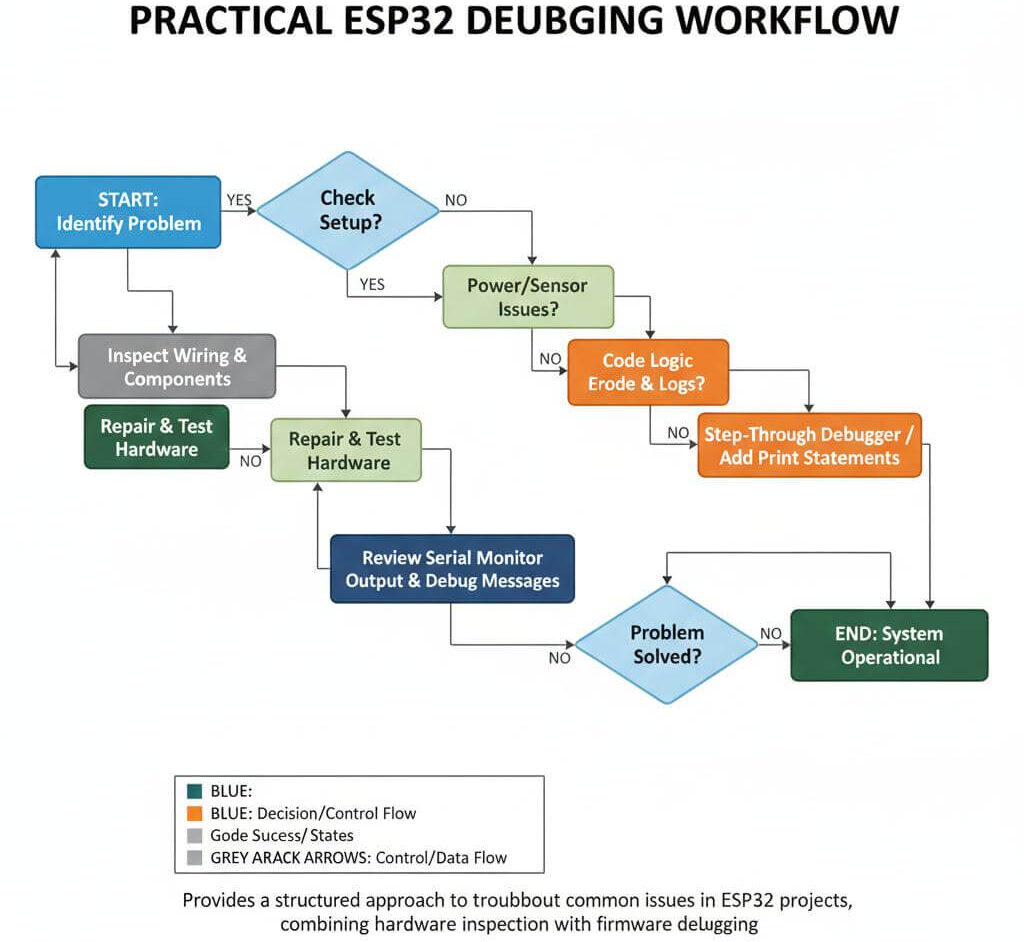
Developers new to dual-core ESP32 projects often encounter similar issues:
- Random resets caused by insufficient stack size
- Watchdog timer triggers due to blocking code
- Tasks with incorrect priorities starving others
- Power instability during Wi-Fi transmission
These issues are isolated with the aid of systematic debugging. Serial logging, task isolation, and incremental testing can particularly be successful with multiple cores.
To get the most benefit from ESP32 dual core:
- Assign time-critical tasks to their own core
- Avoid long blocking delays
- Use multitasking instead of interrupts where appropriate
- Monitor power consumption under load
The use of the dual core should also enhance responsiveness, rather than only add complexity.
Dual-core systems should be tested beyond basic functionality. Validation includes:
- Long-duration runtime tests
- Stress testing with continuous Wi-Fi traffic
- Measuring sensor timing accuracy
- Verifying system recovery after network interruptions
These tests confirm that tasks remain stable and synchronized over time.
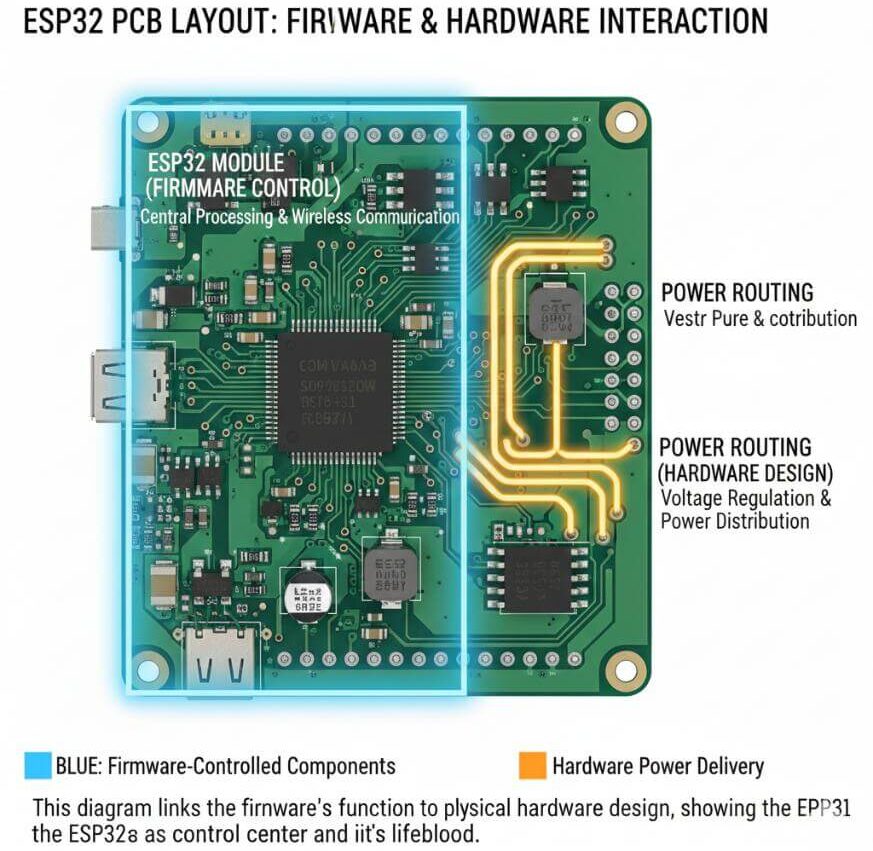
In the case of a dual-core ESP32 project moving to a PCB, hardware design is directly impacted by firmware decisions. The multitasking is to be considered in terms of the allocation of the GPIOs, power routing, and access to the debugging.
Important PCB considerations include:
- Stable power supply design
- Adequate decoupling near the ESP32
- Test points for debugging
- Clear separation of sensitive signals
The dual core apps are more likely to be demanding on the power integrity and thus PCB quality is very significant to it.
The successful utilization of the ESP32 dual core is in the Arduino environment which enables the developers to create more dependable, responsive and scalable embedded systems. With knowledge of scheduling of tasks to cores, shared resources can be efficiently used, and thorough testing can ensure that dual-core processing is not a complex tool.
The ESP32 dual-core support, which is available to Arduino users who are willing to get out of single-loop designs and move to more powerful and capable designs, is an effective next step with the right firmware organization and good PCB design behaviors.