If you have ever shipped an ESP32 project with hardcoded WiFi credentials, you already know what happens next. It works great on your bench, connected to your home network and then it goes out to a customer, or a different building, or a different country, and suddenly it’s a brick until somebody re-flashes it. This is one of the most common headaches in IoT product development, and it’s also one of the most avoidable. That’s exactly the problem WiFiManager was built to solve.
So let’s dig in: what it is, how it actually works under the hood, and how you can get it running in your own ESP32 project, starting from a quick install check and working up to the kind of setup you would actually want to ship.
We’ve all written this line at some point:
And for tinkering on the bench, there’s nothing wrong with that. But the moment your project needs to leave the bench, this approach starts causing real problems:
- No flexibility for whoever’s using it. Whoever deploys the device needs to know the exact SSID and password before you even flash it, or you will need physical access later just to change a setting.
- It’s a security risk. Credentials baked right into the firmware are sitting there in plain text, ready for anyone who pulls the binary apart.
- It doesn’t scale. Got ten units going to ten different sites? That’s ten different firmware builds, or a whole lot of manual reconfiguration.
What we really want is for the device to just ask the end user for their WiFi details, save them, and reconnect automatically every time it boots without us ever having to touch the code again. That’s the gap WiFiManager fills, and it does it really nicely.
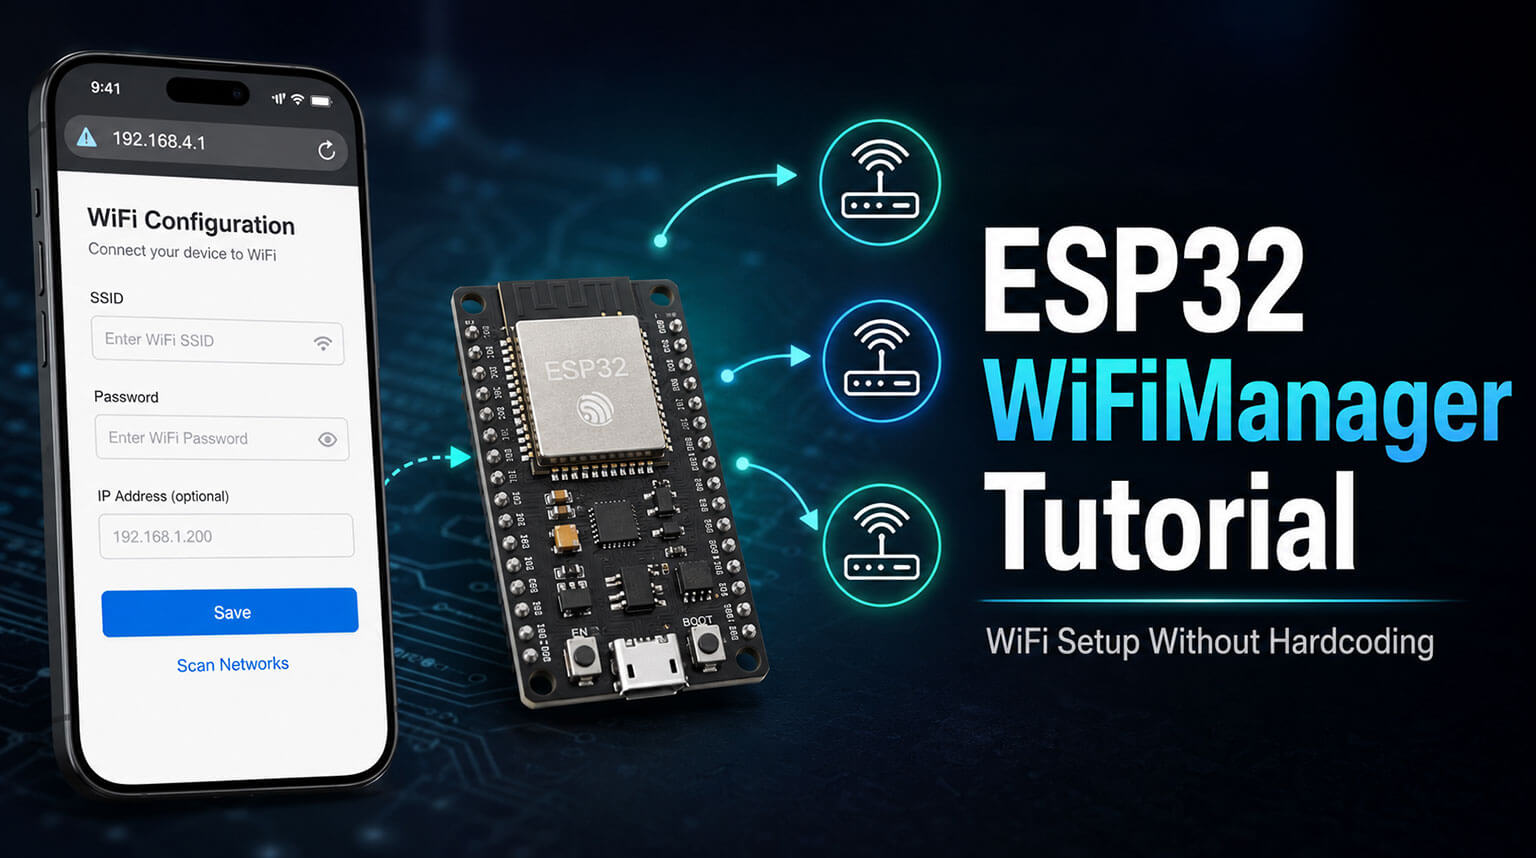
WiFiManager is an open-source library, originally written by tzapu and now maintained by tablatronix, that gives your ESP32 (or ESP8266) project a self-contained, web-based way to configure WiFi. Instead of hardcoding credentials, the device boots into Access Point mode, broadcasts its own little WiFi network, and serves up a simple webpage where the user can pick their network from a scanned list and type in the password.
Once the user hits save, WiFiManager writes the credentials to flash and tries to connect. From then on, every time the device boots, it tries those saved credentials first and only drops back into setup mode if the connection fails. This whole pattern is called a captive portal, and you have almost certainly run into it before: it’s the same trick that pops up a login page the second you join a hotel or airport WiFi.
The ESP32’s 2.4GHz radio can run in three different modes:
- Station Mode (STA): the ESP32 acts like a normal WiFi client, connecting to your router just like your laptop or phone would.
- Access Point Mode (AP): the ESP32 creates its own network, so other devices can connect directly to it.
- Dual Mode (AP+STA): and here’s where it gets clever — the ESP32 can broadcast its own network while also scanning for, or connecting to, another router at the same time.
When the device boots up somewhere new with no saved credentials, WiFiManager flips it into AP mode and starts broadcasting an SSID — something like ESP32-Setup. That gives your phone a way in: a direct bridge to the hardware before it’s ever touched the internet.
Okay, so your phone has joined the ESP32’s network. How do we get it onto the configuration page without making someone type in an IP address by hand? We hijack DNS.
Normally, when you type a URL into your browser, a DNS server translates it into an IP address behind the scenes. While it’s in setup mode, the ESP32 runs its own tiny DNS server — except instead of answering correctly, it answers every single query with its own address, usually 192.168.4.1. Doesn’t matter if your phone’s asking for google.com or anything else; the answer is always “me.”
That DNS trick is exactly what makes the captive portal magic happen. And you have seen this before, probably without realizing it: connecting to airport or hotel WiFi.
Modern phones and laptops automatically check, the moment they join a new network, whether that network needs a login. Apple devices, for example, quietly ping a specific address in the background to find out. Since our ESP32 is intercepting every DNS request, it grabs that background check too. Instead of the expected response, it hands back our custom HTML configuration page. The phone’s operating system sees that and pops open a browser window right then and there. Nobody has to go hunting for an IP address; it just shows up.
Once someone types in their WiFi details and hits “Save,” the ESP32 needs a way to remember that, even after the power’s been cut.
Older boards leaned on EEPROM for this, but the ESP32 uses something newer called NVS, or Non-Volatile Storage. Think of it like a simple key-value store, tucked into its own dedicated partition of flash memory.
The SSID and password get written in as string values under specific keys. Next time the device boots, the firmware checks NVS first, and if it finds something valid, it skips the whole Access Point song and dance and just quietly connects in Station mode. No portal, no fuss, just a normal boot.
Here’s a useful comparison: it’s a bit like applying Design for Manufacturing rules to a PCB layout to save board space. You have got to budget your firmware’s memory the same careful way.
Running an Access Point, a web server, and a DNS server all at once eats up a fair chunk of the ESP32’s RAM. Leave those services running after you are already connected, and you are starving your actual application of memory it might need.
The best move for anything going into production is to tear those setup services down the moment you have got a successful connection. Stop the web and DNS servers, free up their resources once autoConnect() returns, and you have got that heap back for the stuff that actually matters: sampling sensors, running inference, handling power management, whatever your project needs to do.
If you are using the Arduino IDE or PlatformIO, getting it installed is painless.
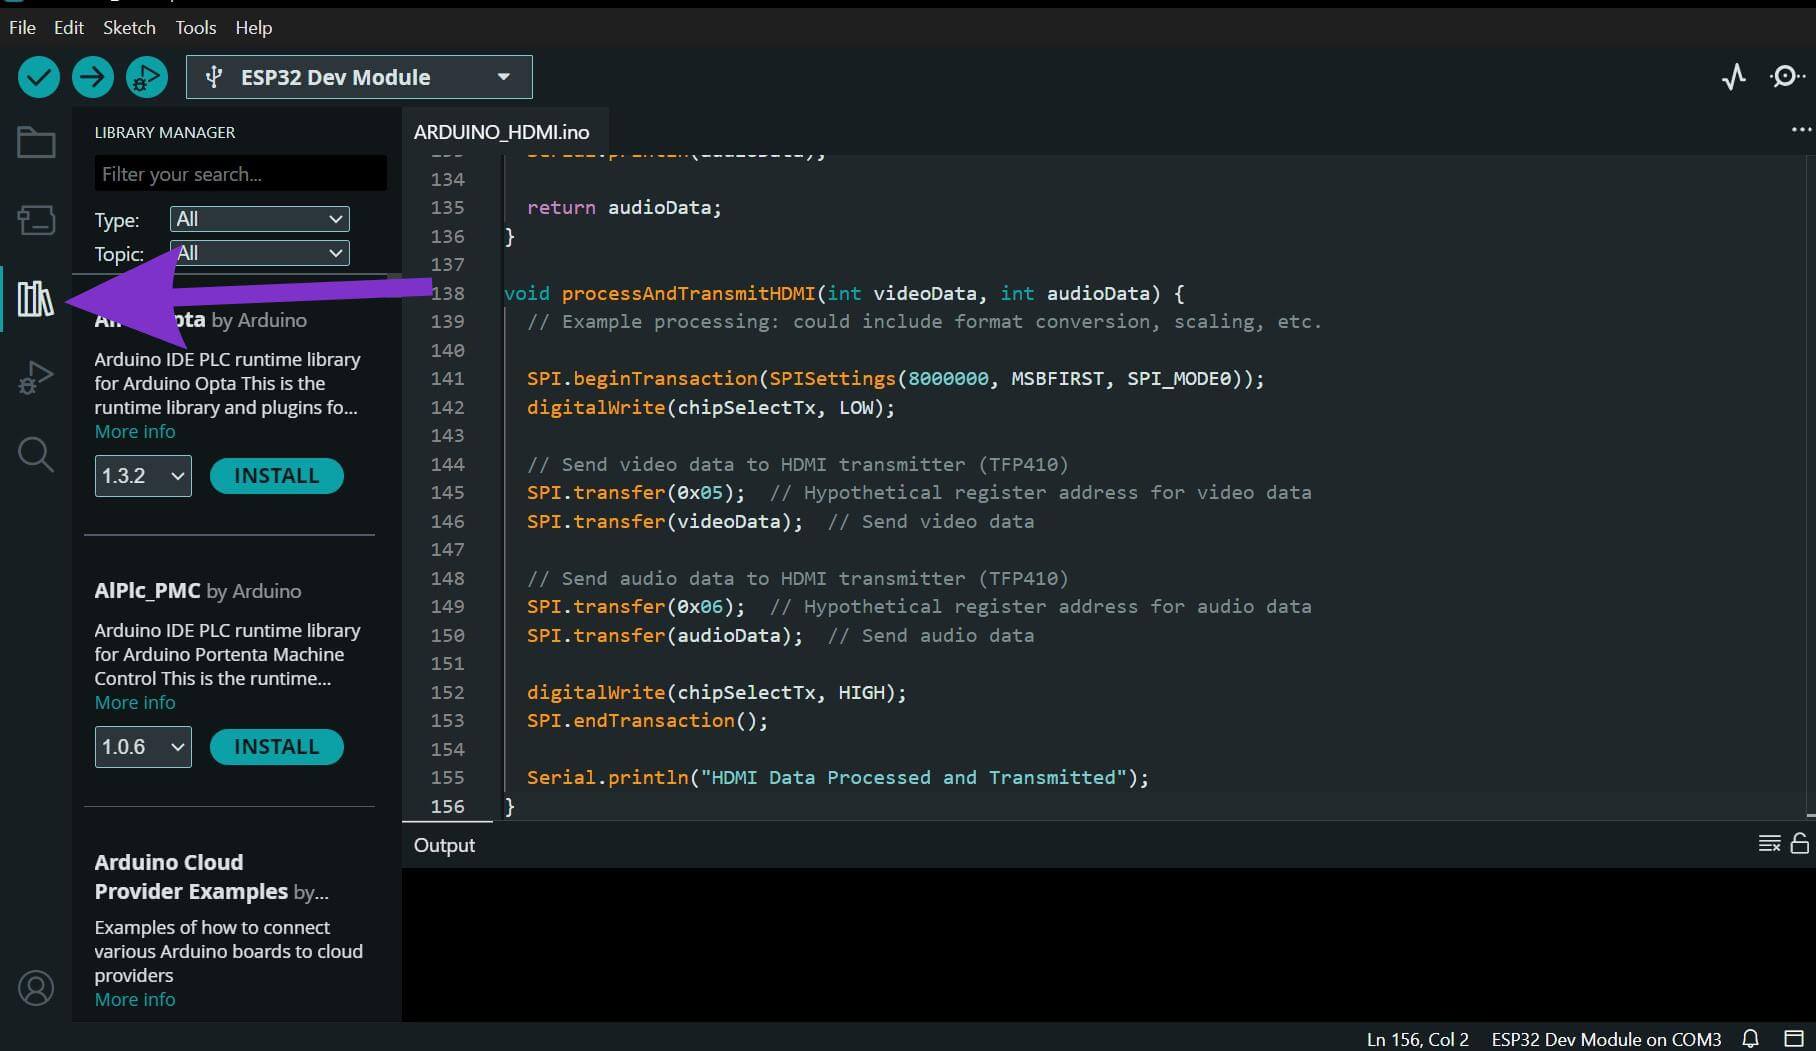
Arduino IDE: open the Library Manager (Sketch > Include Library > Manage Libraries), search for “WiFiManager by tzapu,” and install the latest version, currently 2.0.17.
- Click on the library manager
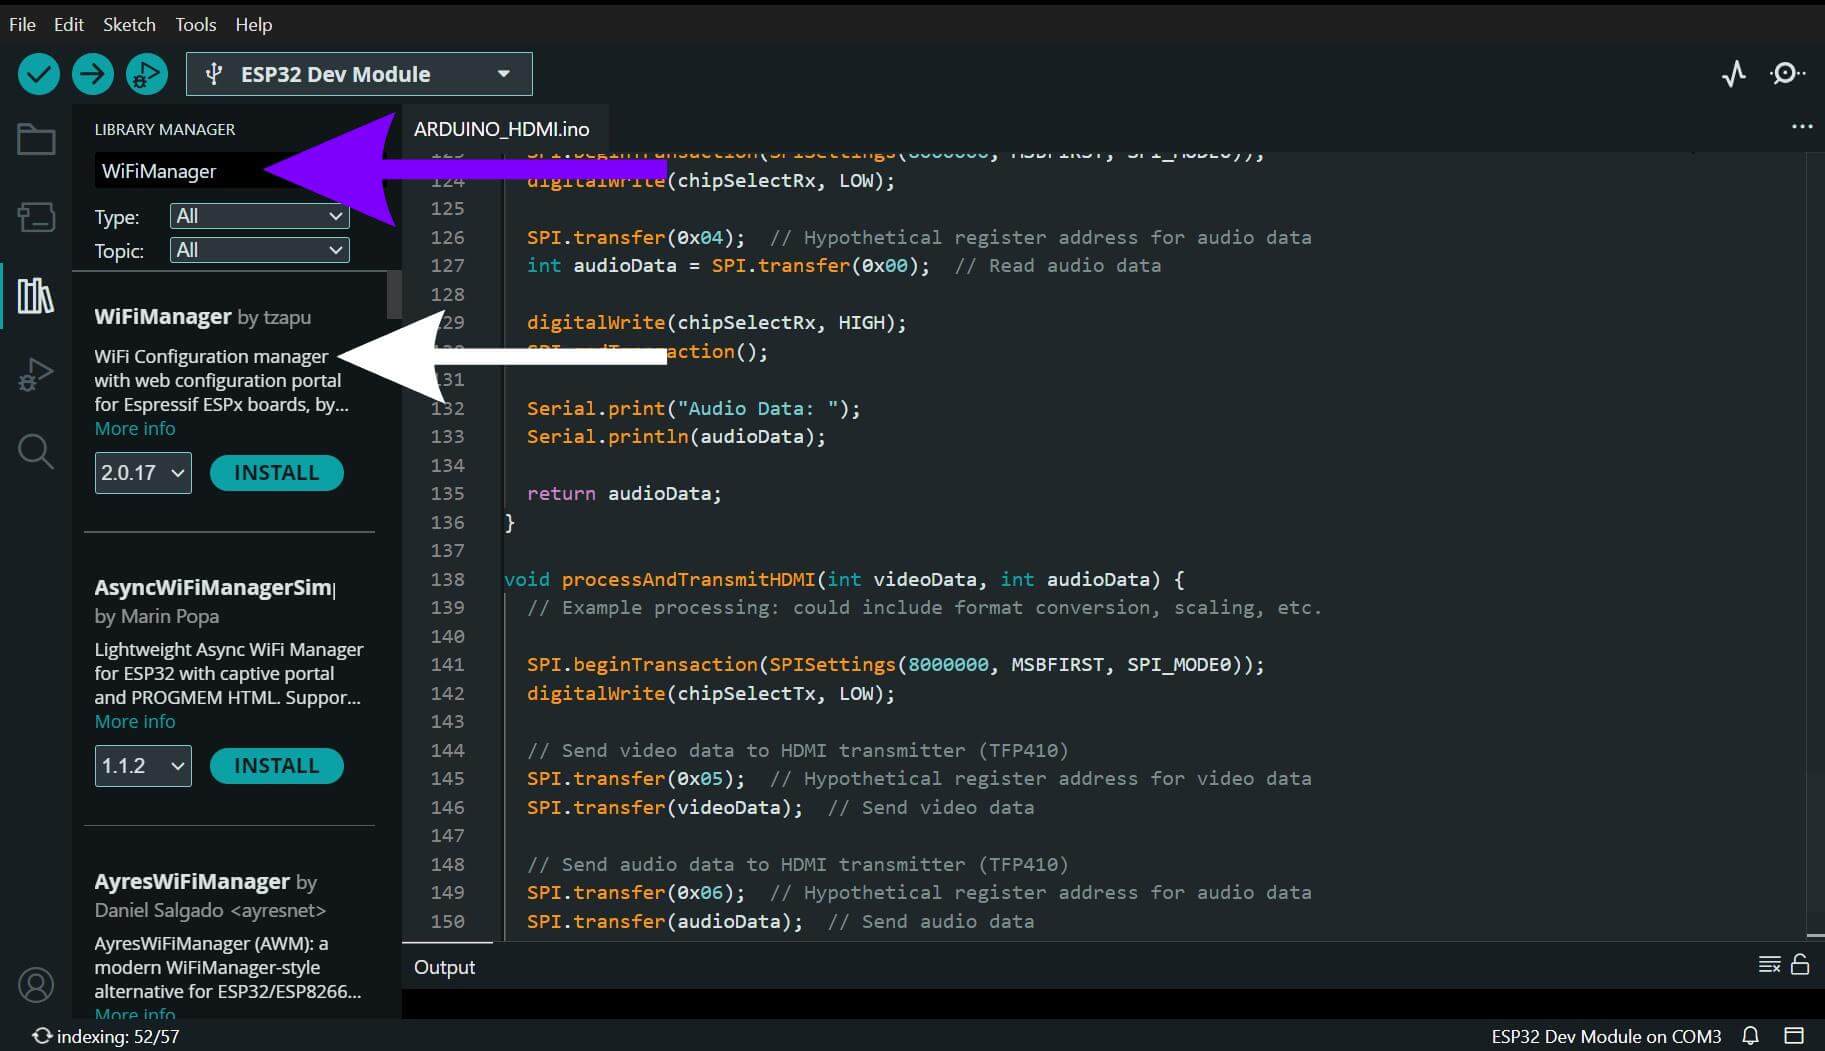
- Type in WiFiManager and install WiFiManager by tzapu
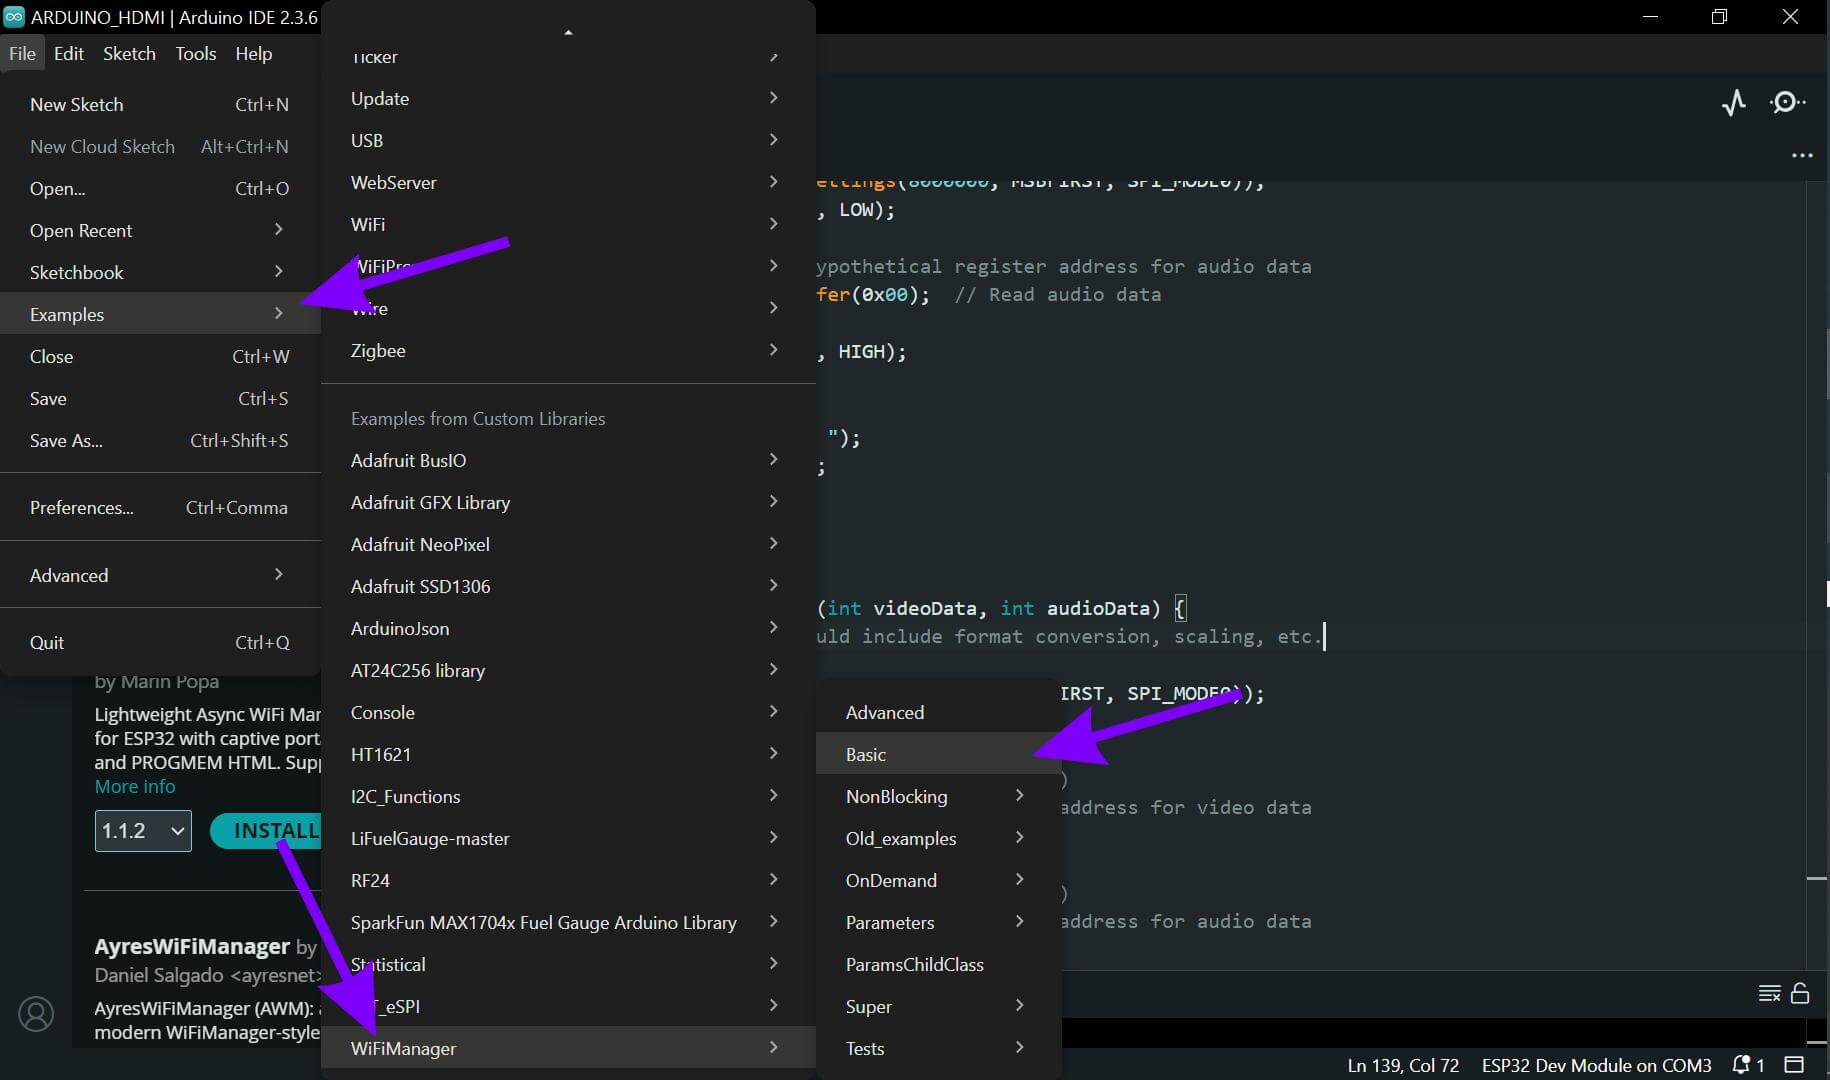
Before you start wiring up custom parameters and NVS persistence, it’s worth confirming the bare minimum actually works first. The library ships an example that does just that look for File > Examples > WiFiManager > Basic
Flash that, and assuming there’s no saved network, your phone should immediately offer to join “ESP32-Setup” and the configuration page should pop right up. Once you have confirmed that’s working, you are ready to build out the full version.
One thing worth knowing: there are a handful of WiFiManager forks floating around the ecosystem, some with additional ESP32-specific fixes baked in. So if you run into compatibility trouble on a newer ESP32 core, it’s worth double-checking exactly which fork you have actually pulled in.
A bare autoConnect() call is great for proving the concept, but a real deployment usually wants a bit more: custom fields like an MQTT server address, a way to wipe saved credentials without re-flashing, and a sensible timeout so the device doesn’t just sit in setup mode forever draining a battery.
Here’s a complete sketch that handles all three, built around three pieces working together.
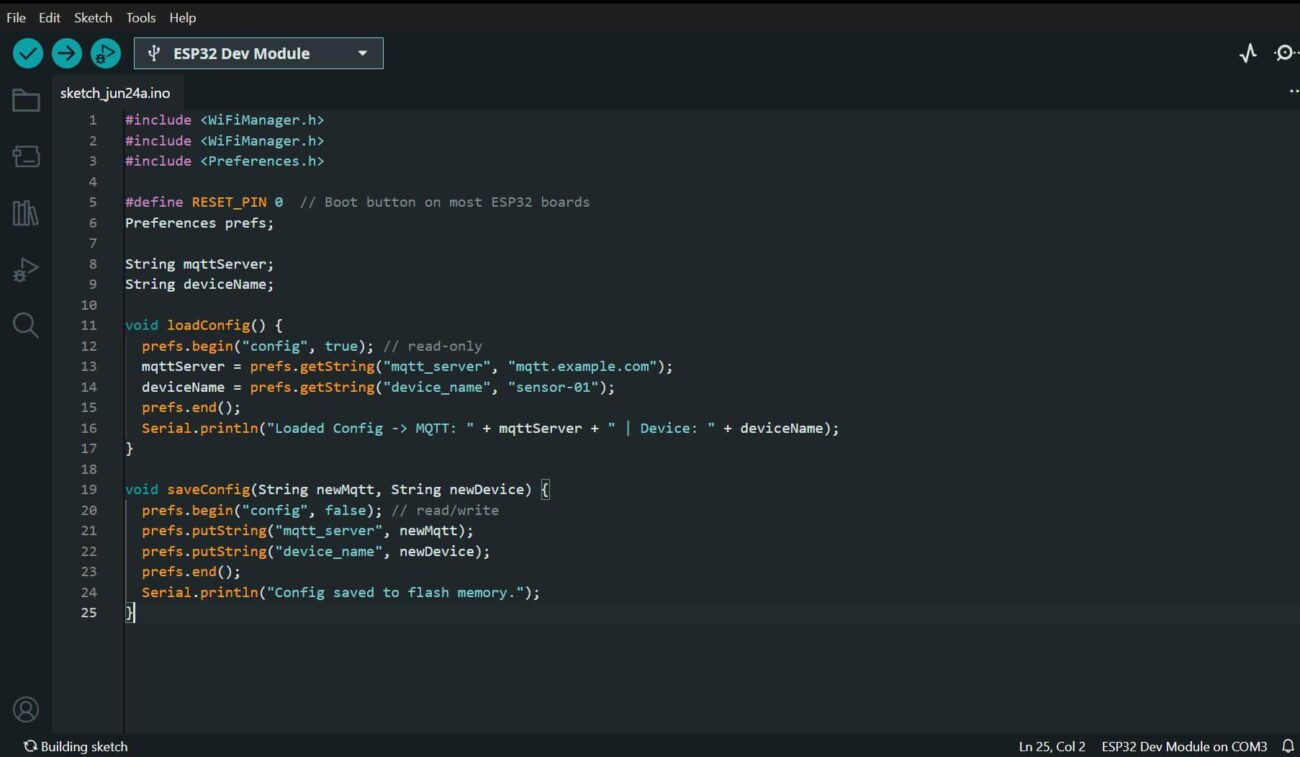
- Memory management. Instead of scattering flash reads and writes all through setup(), we tuck them away into loadConfig() and saveConfig() helpers. That way, it’s immediately obvious, at a glance, exactly which parts of the code are touching persistent storage:
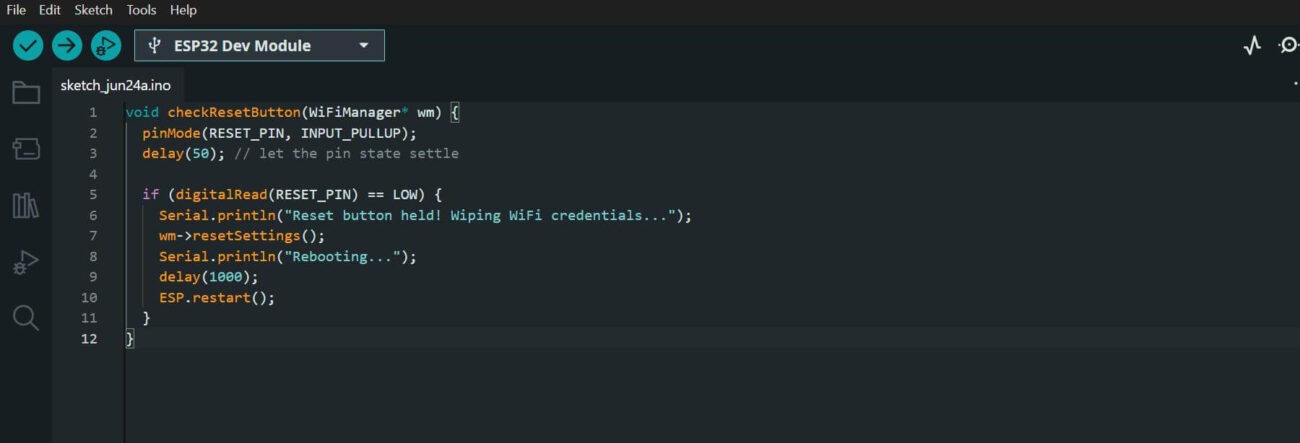
- The escape hatch. Before we touch WiFi at all, we check a physical reset button first. This matters more than it might look like: if the WiFi stack ever gets stuck somewhere down the line, a user with no other recourse needs a guaranteed way out. Checking hardware overrides before anything else means that path can never get blocked by whatever comes after it:
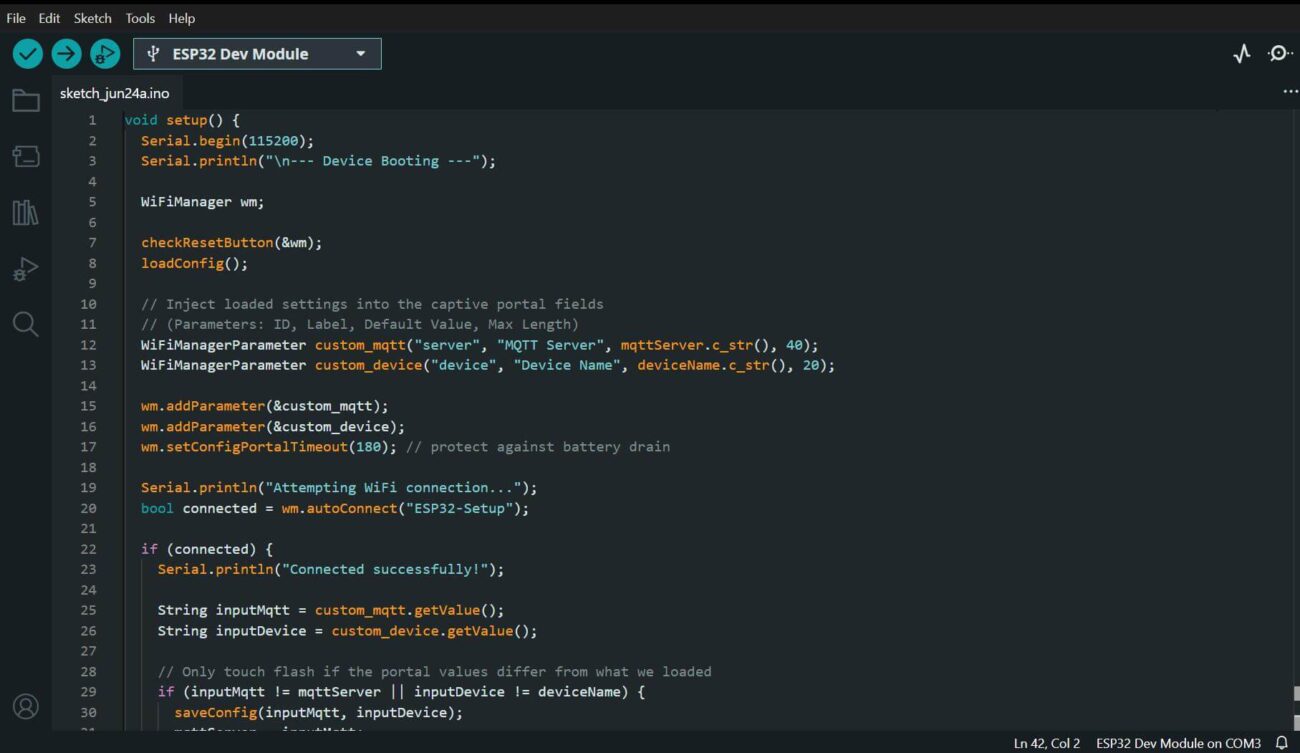
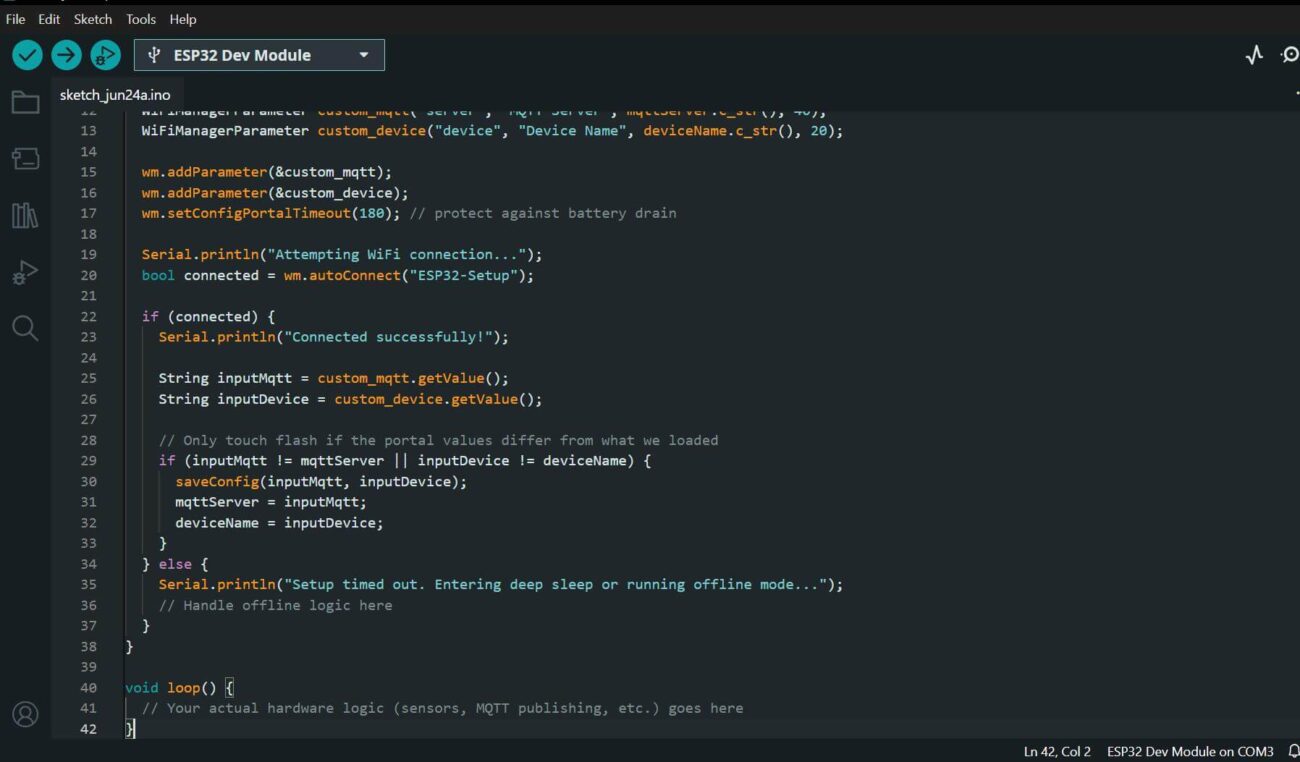
- The setup flow. The flow itself is nice and linear: load whatever’s saved, hand it to the portal as the default values, try to connect, and this part matters only write back to flash if the user actually changed something. No sense burning a flash write cycle just to re-save what was already there:
Put it all together, and you have got a complete, self-contained provisioning flow: it checks for a manual reset, loads whatever is already saved, lets the user see and override that through a captive portal, connects, and only persists what actually changed. No cloud service, no companion app and nothing outside the device itself.
A few things trip people up often enough with WiFiManager that they are worth flagging before you run into them yourself:
- The captive portal does not always pop up automatically. Some Android versions and corporate-managed phones delay or disable that detection. Always print the portal’s IP address (192.168.4.1 by default) to the serial console, so someone can navigate there by hand if the pop-up never shows.
- autoConnect() blocks by default. While the device sits in AP mode, the rest of your setup() code will not run. If you need other things happening during provisioning, look into WiFiManager’s non-blocking mode instead.
- NVS can get corrupted after a core update. Updating the ESP32 Arduino core occasionally shifts the NVS partition layout, and old credentials start reading back as garbage. A clean NVS erase, or a defensive resetSettings() call on a failed connection, is safer than assuming the old data is still good.
- Password-protect your AP. By default, that configuration network is wide open. Anyone nearby can join it and see, or change, your WiFi settings. Pass a password as the second argument to autoConnect() and that door closes.
For most consumer projects and small-batch commercial products, WiFiManager hits a really nice sweet spot: zero external dependencies, a setup flow people already understand from hotel and airport WiFi, and barely any code to wire it in.
That said, it is not the right fit for everything. For headless industrial deployments , think a device bolted to a wall with no screen and no easy physical access, you are probably better off with a fallback hardcoded network plus a remote provisioning path over BLE or a backend API, rather than counting on someone walking up and connecting their phone to the device’s AP. And if you are already living in ESP-IDF instead of Arduino, it is worth comparing this against Espressif’s own native WiFi provisioning, which adds BLE-based provisioning alongside the usual SoftAP/captive-portal approach and tends to fit more naturally into an existing IDF codebase.
But for everything in between the maker projects, the small hardware startups, the “this thing needs to work in ten different customers’ homes without ten different firmware builds” problem WiFiManager is still one of the simplest, most battle-tested ways to solve WiFi provisioning on the ESP32.
That’s the end of this ESP32 WiFiManager tutorial. Once you have the basic setup working, hardcoded WiFi credentials should no longer be part of your ESP32 deployment workflow.
If you run into problems while building an ESP32-based IoT product, you can always discuss your project with PCBCool. We also recently launched an online quotation system, making it easier for both businesses and makers to get quotes for PCB and PCBA projects. If you have a related project, feel free to give it a try.